


Here’s what you should be fairly comfortable with, before starting this tutorial:
- HTML tags
- Javascript and ES6 syntax
- the built in Array.map() method
- using the terminal to change directories
- installing packages using npm or yarn
Setup
First thing is to download the getting started files. I am going to pull down my own customized create-react-app setup from GitHub. Here are the terminal commands I use to get the hello world webpage:
git clone https://github.com/sojohnnysaid/custom-create-react-app.git hello-world
cd hello-world
yarn install
yarn develop
You should now see a browser window with some text. In your IDE you can use the hello-world folder as your root directory. Everything we code from this point on is in the src/index.js file.
What is JSX? First example without JSX
JSX stands for javascript XML and is a shorthand for the way React creates custom HTML elements. For example, In React, without JSX:
// index.js
import React from 'react'
import ReactDOM from 'react-dom'


ReactDOM.render(React.createElement('App',{},'Hello! No JSX being used'), document.getElementById('root'))
This will render the text to the browser, and if we inspect we can see it is wrapped in tags. We use uppercase in our javascript for elements to differentiate them from normal HTML elements.
Adding a class based component
So far we’ve added an element directly into the ReactDOM render method. Let’s create a class with it’s own render() method and insert that into the reactDOM method as a variable.
Instead of ‘App’ as a string we will pass it directly as a class:
// index.js
import React from 'react'
import ReactDOM from 'react-dom'

class App extends React.Component {
	render() {
    	return React.createElement('div', null, 'component class no JSX')
    }
}

ReactDOM.render(React.createElement(App, null, null), document.getElementById('root'))
This puts our string inside of div tags. We can also change it to h1 tags or any kind we want:
// index.js
import React from 'react'
import ReactDOM from 'react-dom'

class App extends React.Component {
	render() {
        //wrapping our string in h1 tags instead
    	return React.createElement('h1', null, 'component class no JSX')
    }
}

ReactDOM.render(React.createElement(App, null, null), document.getElementById('root'))
The createElement method takes 3 arguments – component, props, and children. This method is flexible and allows you to pass a custom element name for the component or an entire class using the name like we’ve shown above. Props are properties and they allow us to manipulate data from outside of our class. Finally children as basically what is inside our component. Our component is like the parent. If we look at the example above our h1 tag is the parent and inside is the children, our string ‘component class no JSX.’
More about props
Not a huge fan of shortening things because it adds confusion. Props is short for properties, and it allows us to fill in data. What are we filling? A class is just a blueprint for an object instance. I’m going to change our tag to a custom tag called ‘App’ instead of the standard h1 tag. In our class we can create placeholders when we add our string inside the parent like this:
// index.js
import React from 'react'
import ReactDOM from 'react-dom'

class App extends React.Component {
	render() {
    	return React.createElement('App', null, `component class with a ${this.props.text} but no JSX`)
    }
}

ReactDOM.render(React.createElement(App, {text: 'property'}, null), document.getElementById('root'))
If you inspect the webpage, notice how was now have custom tags. Our class blueprint now has a property called ‘text’ which we can access using the props argument in React’s createElement method. The second argument to the createElement is always an object and we include the property name and the value we want to pass in when our new object is created from our App class. We don’t have to pass a third argument when we use a class in the first argument, it will pass null by default if we left it out. This works the same:
// index.js
import React from 'react'
import ReactDOM from 'react-dom'

class App extends React.Component {
	render() {
    	return React.createElement('App', null, `component class with a ${this.props.text} but no JSX`)
    }
}
//removed null and completely left out the children argument
ReactDOM.render(React.createElement(App, {text: 'property'}), document.getElementById('root'))
One last thing before we add our JSX: What is Babel?
Babel does 2 things, first it converts our code from the latest javascript syntax, to a version of javascript every major browser can render. So currently ES6 code gets transpiled to ES5 syntax. The second thing Babel does is convert JSX into javascript. It does this using rules setup by React in a special configuration that Babel reads in. This plugin is working behind the scenes so when we write any JSX it turns the code into similar code I’m writing in the examples above using the createElement method. So why do we even want to write JSX at all?
Finally let’s use JSX
I’m going to remove the text property for a moment and just pass a simple string again. Let’s take our App classes render method and return JSX instead of using React’s createElement method:
// index.js
import React from 'react'
import ReactDOM from 'react-dom'

class App extends React.Component {
	render() {
		return <h1>Hello JSX!</h1>
	}
}

ReactDOM.render(React.createElement(App, null), document.getElementById('root'))
On line 7 you can see we can pass in JSX without quotation marks, because JSX is not a string, it is a mix of JS and XML-like markup. Behind the scene the createElement is behind called, after some time learning the flow it will become clear JSX is easier to read and maintain. Notice the last line we are still using createElement for App, so let’s change that but just passing in a custom tag like this, because JSX allows us to write a single self closing tag to do the same thing:
// index.js
import React from 'react'
import ReactDOM from 'react-dom'

class App extends React.Component {
	render() {
		return <h1>Hello JSX!</h1>
	}
}

ReactDOM.render(<App />, document.getElementById('root'))
Passing props using JSX
Now that we are using JSX, how do we pass a property from reactDOM.render to the App class so it can create an object that will become our component on the webpage.
We’ll pass in what looks like an html attribute like class or onclick, but this will be a custom attribute that matches the property in our App class “blueprint.” Here we’ll use text again as our property name:
// index.js
import React from 'react'
import ReactDOM from 'react-dom'

class App extends React.Component {
	render() {
		return <h1>Hello JSX! {this.props.text}</h1>
	}
}
//removed null and completely left out the children argument
ReactDOM.render(<App text='Hello props!'/>, document.getElementById('root'))
Anything we add in between JSX that is javascript like this.props.text has to be wrapped in curly braces. This is what tells Babel to stop interpreting JSX and run javascript code.
This does not mean we have to do this outside of the JSX. You can write normal Javascript everywhere else like this:
// index.js
import React from 'react'
import ReactDOM from 'react-dom'

class App extends React.Component {
	render() {
        const text = this.props.text
		return <h1>Hello JSX! {text}</h1>
	}
}

ReactDOM.render(<App text='Hello props!'/>, document.getElementById('root'))
I’ve created a text variable and am passing it inside the JSX. I use curly braces, which will interpret the variable based on what I pass to my JSX:
Working with multiple properties and arrays
Let’s add a second property called seasons and we’ll pass an array of the 4 seasons:
// index.js
import React from 'react'
import ReactDOM from 'react-dom'
class App extends React.Component {
render() {
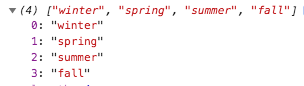
console.log(this.props.seasons)
const text = this.props.text
return <h1>Hello JSX! {text}</h1>
}
}
const seasons = ['winter','spring','summer','fall']
ReactDOM.render(<App text='Hello props!' seasons={seasons}/>, document.getElementById('root'))notice the curly brackets around the seasons value inside of the JSX . Just remember anytime you introduce a javascript expression inside of JSX it has to be wrapped in {}brackets
So we’ve passed this to our class and it is now available in our App class this.props object. Let’s console.log and inspect the browser when the page loads:
So let’s display them on the page using a standard unordered list using these HTML elements:
Quick note! When you return something that requires multiple line breaks, remember to wrap your code in parenthesis:
// index.js
import React from 'react'
import ReactDOM from 'react-dom'

class App extends React.Component {
	render() {
        const seasons = this.props.seasons
        const text = this.props.text
		return (
			<ul>
				<li>{seasons[0]}</li>
				<li>{seasons[1]}</li>
				<li>{seasons[2]}</li>
				<li>{seasons[3]}</li>
			</ul>
		)
	}
}

const seasons = ['winter','spring','summer','fall']
ReactDOM.render(<App text="Hello text property!" seasons={seasons}/>, document.getElementById('root'))
remember even though it looks like normal HTML it is in fact JSX so we need those brackets for any javascript code inside the JSX.
What if we pass the whole array like this: {seasons}
// index.js
import React from 'react'
import ReactDOM from 'react-dom'

class App extends React.Component {
	render() {
        const seasons = this.props.seasons
        const text = this.props.text
		return (
			<ul>
				<li>{seasons[0]}</li>
				<li>{seasons[1]}</li>
				<li>{seasons[2]}</li>
				<li>{seasons[3]}</li>
                <li>{seasons}</li>
			</ul>
		)
	}
}

const seasons = ['winter','spring','summer','fall']
ReactDOM.render(<App text="Hello text property!" seasons={seasons}/>, document.getElementById('root'))
Running this gives us our list and the list item is each season bunched together with no spaces. So JSX will even evaluate an array into a string.
Now we can leverage this by creating a new array with our season names, but with the tags wrapped around each one.
Since we’re doing the exact same thing for each item in the array to create a new one we can use the map method which is a built in array method.
Remember we don’t need brackets outside of JSX only in between the tags. First let’s create our new array using map:
// index.js
import React from 'react'
import ReactDOM from 'react-dom'

class App extends React.Component {
	render() {
        const seasons = this.props.seasons
        const seasonsList = seasons.map((name, index) => <li>{name}</li>)
        const text = this.props.text
		return <ul>{seasonsList}</ul>
	}
}

const seasons = ['winter','spring','summer','fall']
ReactDOM.render(<App text="Hello seasons!" seasons={seasons}/>, document.getElementById('root'))
Let’s add back in our text property at the top to give our list a title:
// index.js
import React from 'react'
import ReactDOM from 'react-dom'

class App extends React.Component {
	render() {
        const seasons = this.props.seasons
        const seasonsList = seasons.map((name, index) => <li>{name}</li>)
        const text = this.props.text
		return (
        	<div>
            	<h1>{text}</h1>
            	<ul>{seasonsList}</ul>
            </div>
        )
	}
}

const seasons = ['winter','spring','summer','fall']
ReactDOM.render(<App text="Hello seasons!" seasons={seasons}/>, document.getElementById('root'))
Notice how I wrap everything in a signal parent tag? Whatever we return from our class has to be wrapped in one single tag. If we try to run this without the we get an error for trying to return two parent tags. Always one parent and as many children as we want inside.
That is our entire program! Hope all of that made sense. This is just the start but the more comfortable you feel now the better as things become more spread out and complicated. React is not a framework, it is a library that gives you access to methods. Also React has a plugin which works behind the scenes with Babel to change our code on the fly when we save. Webpack is what is serving our page to the browser when we are developing.
What is Webpack?
Webpack is a tool that takes your files and packages them into a folder that you can send to your server. This is the production ready version of your application is commonly known as a “build.” It also runs the development server when you run ‘npm start’ or ‘yarn start.’
I use yarn so i’m going to create a ‘build’ folder that is the production ready version of my web application. This folder can be sent to a server which users can request to use your web app. Everything is self contained and create to be as efficient and fast as possible.
I’ll run ‘yarn build’ and in the terminal it will take about a minute to create my production build…
to run my build I will need to install the yarn serve package by typing:
‘yarn global add serve’
I will then cd into the build directory
and finally run the command ‘serve’
now my webapp should appear in the browser again. You might notice also it is a little faster to load up. This code is not to be touched. If you need to make a change go back to our index.js and re-build again to have a production ready app!
Conclusion
React is confusing at first. I’ve found a lot of tutorials really try to cram too much into an introduction, when the code above is all you need to start learning. Learning and getting comfortable is the first step, trying to build an app and learn React at the same time is only going to lead to headaches 🤦♂️
Once you feel really comfortable with what we’ve written so far, check out the next tutorial. We’re going to build a simple input that updates some text in realtime, then a simple button to clear our text. This is the reactive part of react!